Week 3: Computer Aided Design

This weeks assignment is to model (raster, vector, 2D, 3D, render, animate, simulate, ...) a possible final project, and post it on your class page. The specific question was to try out as many pieces of software as possible. Since my husband is abroad this week and the nights where short because of kids not staying in their beds, the conditions where poor, so to say. (And probably will be next week). So 'as many as possible' for me meant: two software packages to explore. Luckily I allready tried out Adobe Illustrator as a preparation for this course. I will show these results here as well. Also a year ago I followed some lessons in Sketchup. This was not particularly done as a preparation for this course, so I will not show the results here.
Preparing with Adobe Illustrator
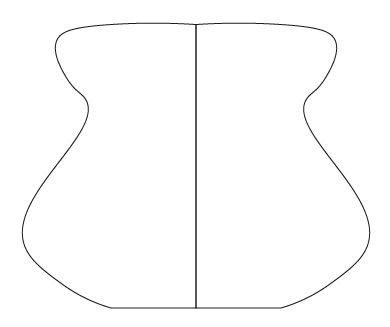
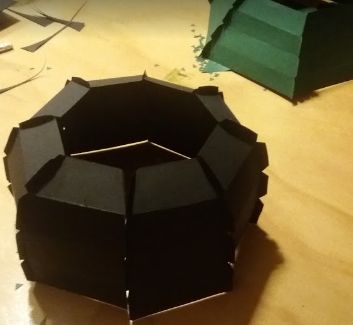
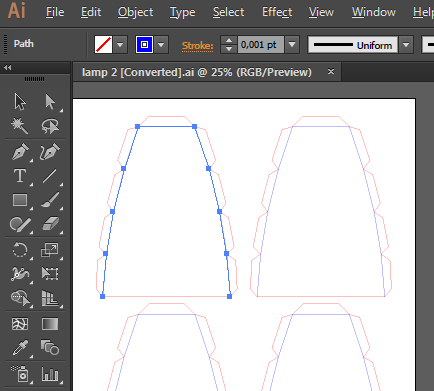
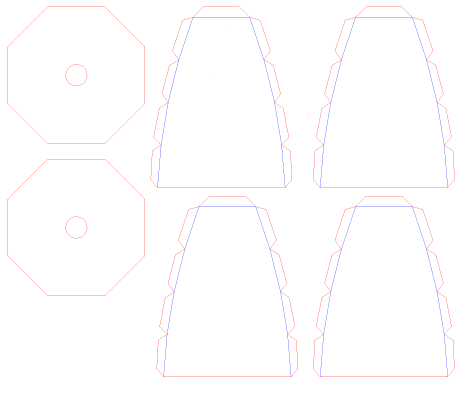
A colleage adviced my to allready start some computer aided drawing and to get to know the laser cutter in anticipation of this course. So I tried working with Adobe Illustrator. I designed the parts of a lampshade i had seen. First I started sketching on paper and cutting out the pieces to see what the result would be (picture on the left). In the background you an earlier prototype. After that I started drawing in AI. I learned to make shapes and lines, to align them and to combine shapes. For the design's sake I had to make trapeziums. This is not easy in AI for one cannot define an angle of two lines in a shape. I worked around this by defining the length of the upper and lower base, the two parallel lines, and the distance between them with a reference line and and then connected the upper and the lower base. I also learned to define stroke colour and stroke fill. This was necesary voor the cutter to make the distinction between cutting and engraving.(picture in the middle) More on this in week 4 I guess. The picture on the right shows the result. The actual shade has 8 planes, but the pieces of board I cut them from where not big enough to cut out al shade pieces. I have another file with the other four planes.
You can download the files here:
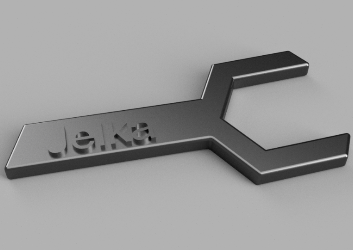
AI files lampThis weeks work: Fusion 360
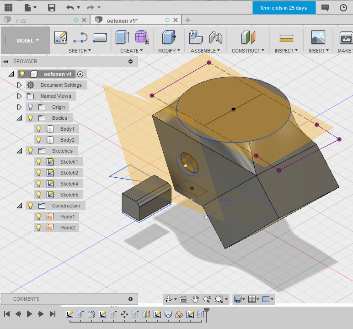
The week started with a day long Fusion 360 workshop by Mauro Jannone. In the train traveling to Amsterdam I watched a tutorial uploaded by Lars Christensen on YouTube called Fusion 360 Tutorial for Absolute Beginners - Part 1 Lars taught me to set the measures in document settings (on the left) to mm's, to choose a plane (front, right or top) to draw on, what constraints are some key commands like
S=Model Toolbox
Q=Push/Pull
C=Circle
D=Dimension
L=Line
X=Construction
P=Project
Ctrl+Z=Undo
J=JoinAfter this Mauro taught us many many things, but maybe the biggest lesson I learned three days later;
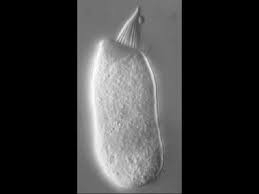
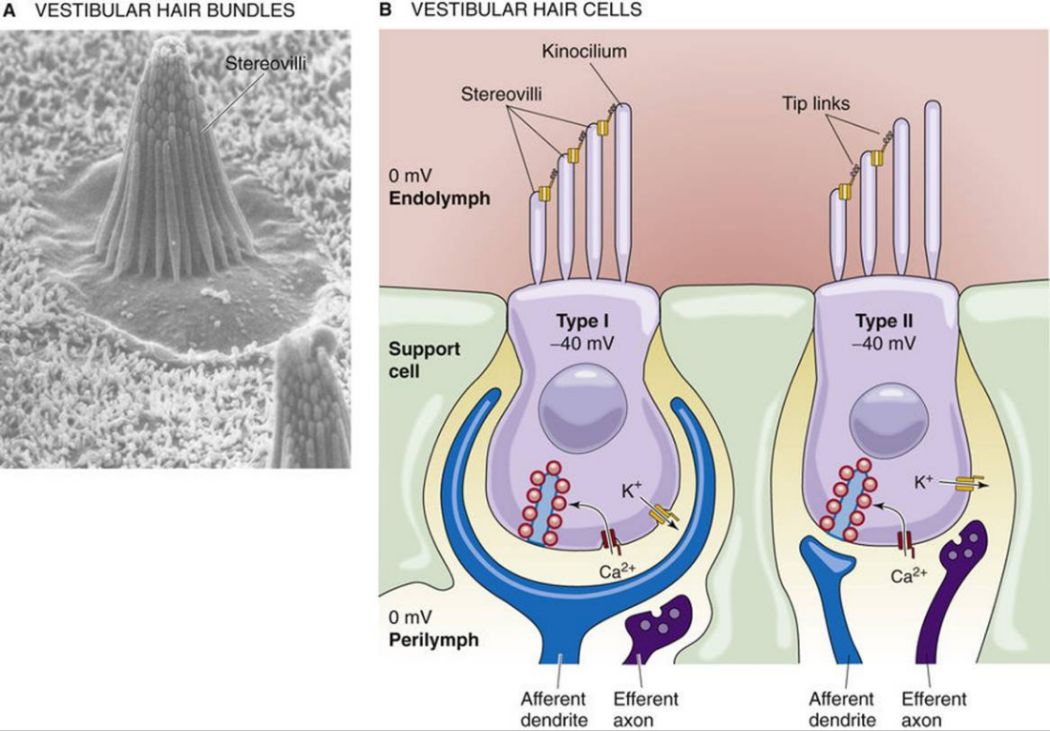
And now it was time for me to design something related to my final project. I planned on drawing a sensory cell. I did a short picture search for sensory cells and decided the auditory hair cell it was going to be. Underneath here a microscopic picture of a hair cell from A.J. Hudspeth, Science, 230; 745-752, 1985. And next to it a schematic picture made by Philine Wageman of Kansas State University.
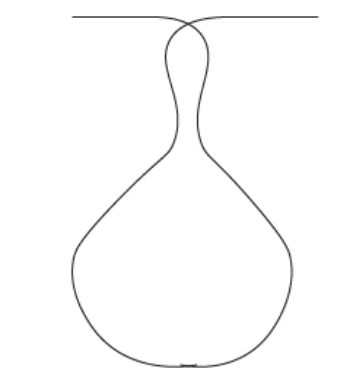
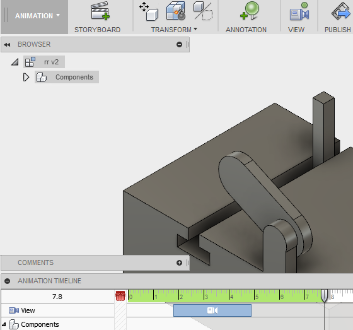
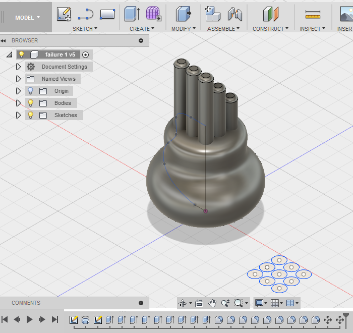
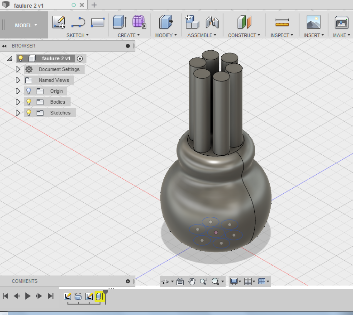
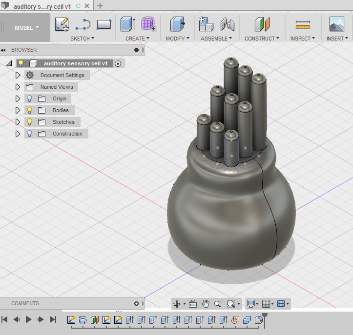
So on to trying to design this. The cell body was really easy. I used 'spline' and simple lines to sketch the outline of the cell body and then revolved along the x-axis. But designing the hairs and joining them to the cell body took me for ever. I totally forgot about the 'boundary fill' function. I stumbled along with the 'combine' function, but that didn't give me the possibility to cut the parts of the hairs sticking inside the cell body. I gave up and named the file 'failure', the left picture is where i left of. Then I tried sketching in the 'ground' of the cell body and to extrude from the upper face of the cell body. This way I was obligated to arrange the hairs in a circle. This was anoying allready, but hadn't put me off yet. Wat made the second attempt into failure nr 2 (picture in the middle) was the fact that the center hair cell would not extrude from the upper face of the cell body for some reason. Finally a sketched circles on an ofset face of the upper face of the cell body, extruded the hairs, cut away the parts sticking in the cell body with 'boundary fill', choosing cut and selecting those parts as cells. After this I fileted (is this a verb?) the edges of the hairs to make them look like hairs. Very thick hairs, I know. But the idea is to make a molding form uit of this and fill it with silicone. I recon it shouldn't be too thin. Another thing I want to design later on is the molecular connections between the hairs that open ion gates mechanically on movement of the hairs. Totally awesome. At the top of the page you see the succesfull history of the hair cell design.
Oh, and another thing I want to add. In spite of my strugglings I love Fusion360. It is so powerfull and user-friendly at the same time. I'm never touching Sketchup again. You can download my file here. The password is FabAcademy2018. Or click the buttons below for the STL file and the f3d file:
STL file auditory sensory hair cell f3d file auditory sensory hair cellThis weeks work: Inkscape
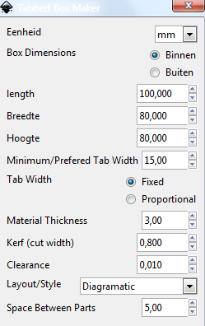
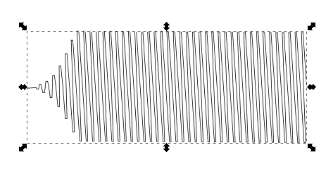
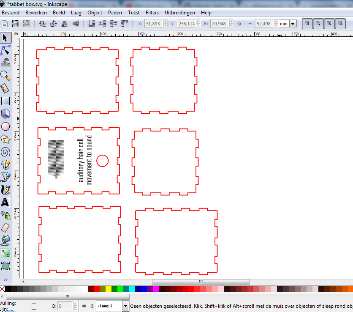
As we where asked to also degign in 2D, I desided to draw a box for my neuron. Not very original I know, but a good way to get familiar with new software. I opened Pinterest for some inpiration on boxes. I would love to make a living hinge some day but I sttled for a tabbed box. Next I started looking for tutorials for drawing one and I found one for a special extension for Inkscape for drawing a tabbed box called Inkscape Laser Tutorials - Using the Tabbed Box Extension.. So, allthough Iplanned on using FreeCad, I downloaded Inkscape. This took 20 minutes. Opening the program took 5. The tutorial tells you to go to go to this Github: https://github.com/hellerbarde/inkscape-boxmaker. Then donload the files there and copy and paste the filesboxmaker.pyandboxmaker.py into the map extensions. Now in Inscape in the extensions menu you can select the boxmaker and simply fill in the dimensions of the box you want to have. What it looks like you can see on the left picture. After this I wanted a hole in the lid to put your finger through and lift it. I used the tutorial how to easily align objects and text using Inkscape.to align the hole horizontal axis of the lid. After this I wanted to add a picture on the lid for the machine to engrave later on. I decided to draw one of the output singnals of a hair cell, or actually its efferent neuron. Nature Reviews provided a beautiful picture that you can find here. First I tried to convert the picture to bitmap and then 'trace' it. I failed. After this I sketched elipses half way, mirrored them and joined them together. This gave a nice result. You can see the result in the picture in the middle. After this I set the fill colour to RGB black and stroke colour to none and Inkscape filled in the elipses. Now it didn't look so nice anymore, but nice enough... The final result is shown on the right.